

Sawasdee ka~
If you didn't like the idea of making photo book in the first post of this Valentine series. Make a sweety for your loved one may be another good choice. I usually make molded chocolate, cupcake or cookies on Valentine's day. Today I'm going to post my favourite cookies recipe that is really easy to make and yummy. I won't make them this year though because I'm not in my flat (in Japan now). So I can't show you guys my cookies decoration pictures. To apologise, I will put loads of cookie decoration examples I found in this post instead. Hope you don't mind :)
What you need for cookies
3 cups Plain flour
1/2 teaspoon Baking powder
1/2 teaspoon Salt
3/4 cups Caster sugar
226.5 grams Unsalted butter
85 grams Cream cheese
1 egg
1 teaspoon Vanilla extract
Baking the Cookies
1. Mix all dry ingredient together and leave it
2. In a different bowl, blend butter and cream cheese until well mixed then add sugar and blend for 2 minutes
3. Add an egg and vanilla extract in a wet ingredient bowl and mix it for another 2 minutes
4.Once the ingredients are “fluffy” add in dry ingredients slowly for 2 minutes
5. Wrap the dough and put it in a fridge for at least 2 hours
6. When you ready preheat oven to 375 F. Line a baking sheet on a tray you want to use
7. Roll out dough to ¼ inch thick
8. Next you can cut to any shape you would like (I used a heart shape to show a little more love)
9. After cutting the shapes bake for 10 - 12 minutes (Don’t place to close as they will expand while cooking)
10. Once golden brown remove from oven and let cool for 20 minutes
Ingredients for royal icing
250 g Royal icing (I used royal icing from Silver Spoon)
30 ml water
1 teaspoon lemon juice
Few drops of food colours
Piping bags
Tips no. 3
Toothpick
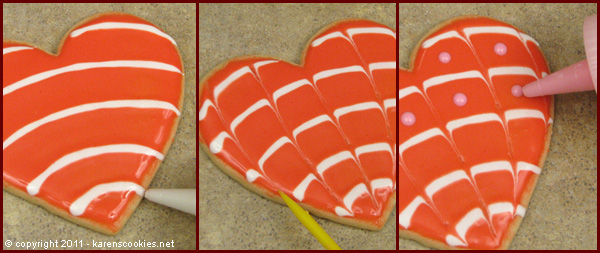
Icing the cookies
1. Mix royal icing powder, water and lemon juice together. Blend until it looks fluffy
2. Separate royal icing in to 2 bowls or more depend on how many colour you pick
3. Use the colours you have picked
4. Put the icing in an icing bag
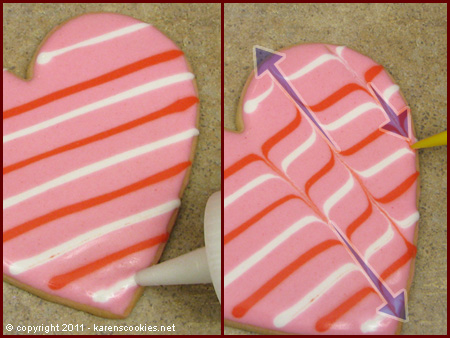
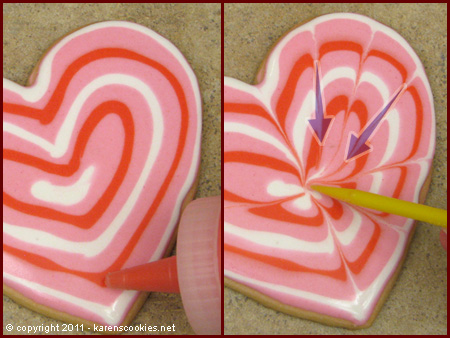
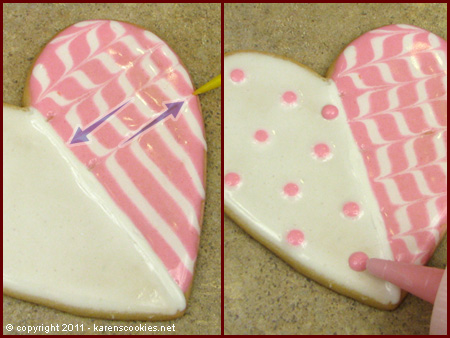
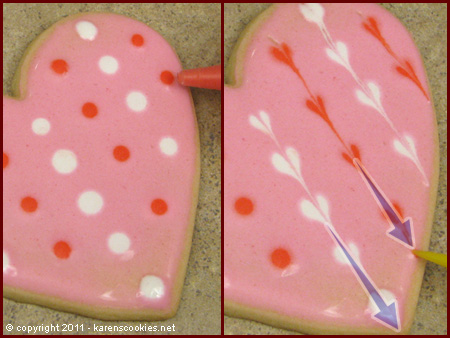
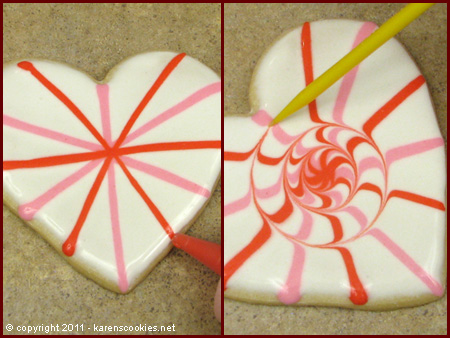
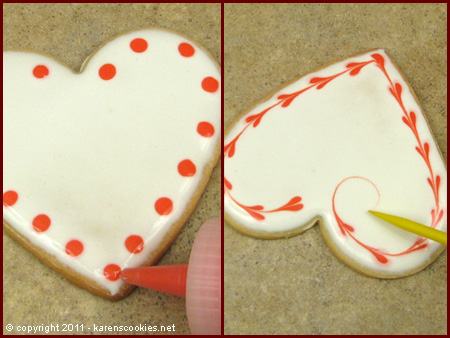
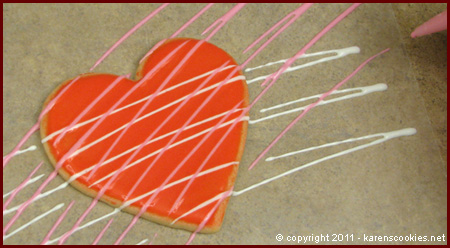
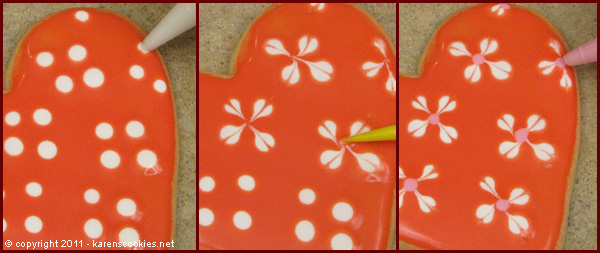
Now it's fun time DECORATE YOUR COOKIES :)
Caution : Let painted cookies dry over night before continue decorating


Hope you like my selection of cookies decoration. I promise if I have time to make one I will definitely show you guys :)
Mwahhh
xxx
These look so yummy:) great blog thanks for the follow:) I followed you back:)
ReplyDeletex
These all look so yummy!! Mmmm :)
ReplyDeletewww.sapphirevalentino.com
They are all nice :)
Delete